This article explains how to access your projects in Portail Probance, understand what is expected from you, and complete your tasks to move your project forward. For more information, watch our video tutorial “How to access a project’s Timeline and understand why it’s blocked“.
1. Access your ongoing projects and services
To access your ongoing projects and services:
- From the Probance Portal homepage
- Click on the My Services module
- Click on the Access my service requests button
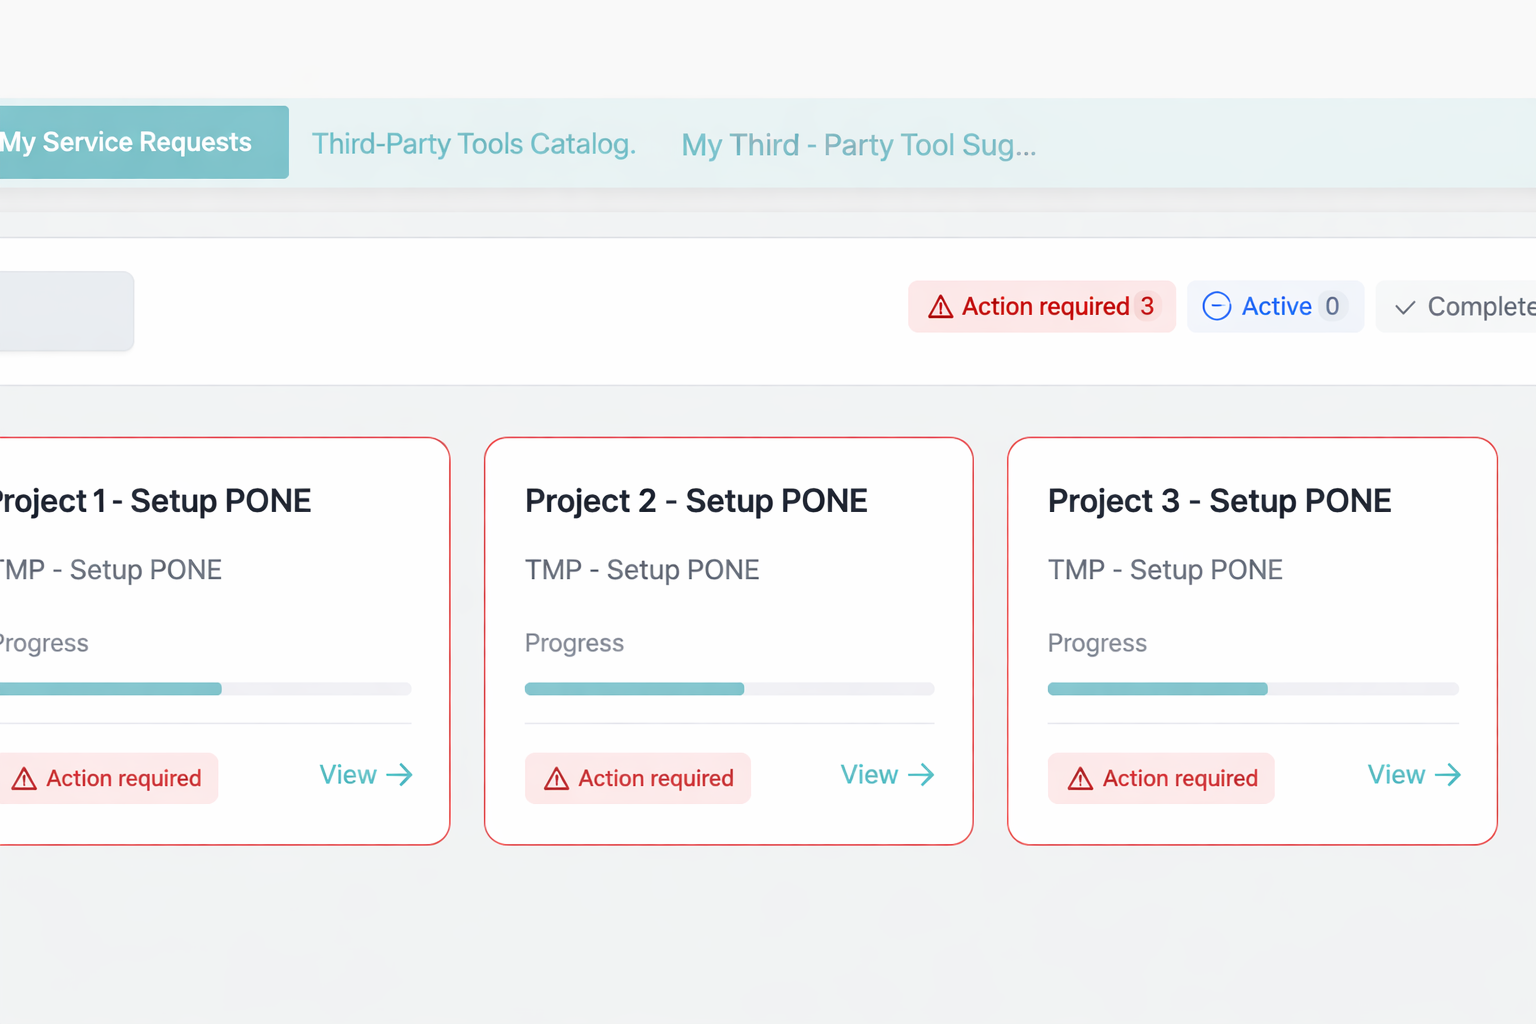
You will then be taken to a page listing all your ongoing projects and services.

2. Understanding the list of your services
Each service corresponds to a specific request, for example the installation of the Probance One solution on your website or a specific service delivered by the Probance teams.
If you work with Probance across multiple brands, websites, or services, it is therefore normal to see several services running in parallel.
For each service, you can view:
- the service name,
- the brand or website concerned,
- a progress bar indicating the overall progress,
- an icon indicating that an action is required from you.
3. Access the details of a service using the View button
To view the details of a service, click on the View button.
This button allows you to:
- access the detailed content of the service,
- view the associated tasks,
- immediately see whether an action is required from you.
4. Understanding the Project overview page
After clicking View, you will access the Project overview page, where you can follow the progress of the service and complete the requested actions.
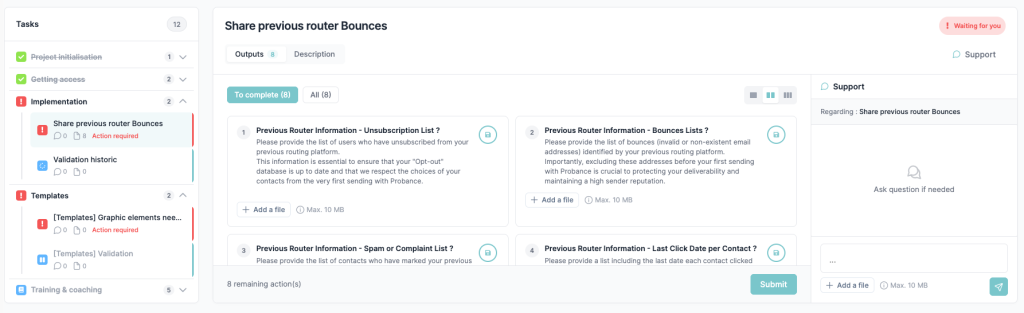
This page is organized into four main areas.
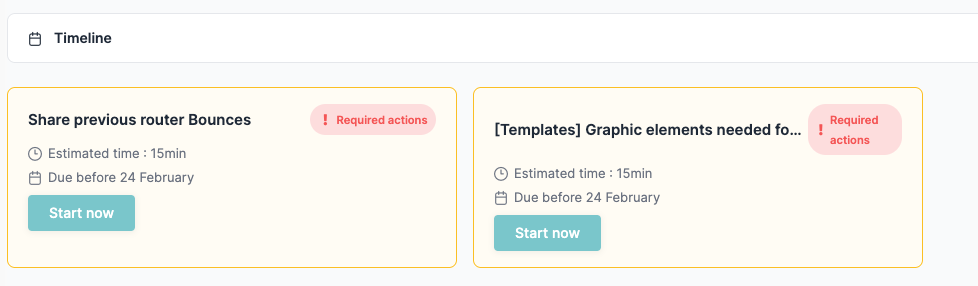
Top: required actions
At the top of the page, a section highlights the priority actions that require your attention.
Each card shows:
- the task name
- an estimated time
- a due date
- the status Action required
Click Start now to access the task directly.
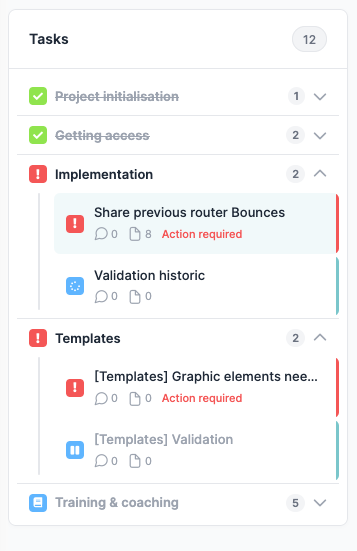
Left side: task list
On the left side, you can see all tasks related to the service, organized by phases (for example: Implementation, Templates, Training & coaching, etc.).
Each section can be expanded to display its tasks. Tasks may display different statuses:
- red ! – Action required: an action is required from you
- green ✓: the task is completed
Click on a task to display its details in the central area.
Center: complete the task
The central area displays the selected task.
Here you will find:
- instructions explaining what is required
- the information or files to provide
- the actions to complete
Depending on the task, you may need to:
- upload a file
- provide requested information
- click Submit to validate your contribution
👉 Once your action is submitted, the Probance teams can continue the configuration.
Right side: contact support
The right panel allows you to communicate directly with the Probance teams through the Support area.
You can use it to:
- ask a question
- request clarification
- report a blocking issue
👉 All exchanges remain centralized within the portal, directly linked to the related task.
5. Identifying tasks that require your action
Some tasks require your action in order for the service to move forward.
These tasks are identified by:
- a red exclamation mark (!)
- the status Action required
They also appear in the Required actions section at the top of the page.
👉 Until these actions are completed, the configuration cannot progress.
6. Completing a task and submitting information
To complete a task:
- Select the task in the left panel
- Follow the instructions in the central area
- Add the requested information or files
- Click Submit
The information is then automatically transmitted to the Probance teams.
7. Asking a question from a task
If you have a question:
- Use the Support section on the right
- Write your message
- Send it directly from the task
👉 This allows the Probance teams to respond quickly.
If you have any doubts or questions:
✅ Key points to remember
- My Service Requests → view all your ongoing requests
- View → access the details of a service
- Required actions → quickly identify actions to complete
- Left side → navigate between tasks
- Center → complete the requested information
- Right side → contact support