Our Woocommerce coupon module allows you to automatically generate promo codes when sending campaigns with Probance One, usable by recipients who also exists in your Woocommerce database.
This tutorial will explain how to create a master code in Woocommerce, and how to use it in a Probance One campaign to generate targeted promo codes.
To use this option, Probance module for Woocommerce module must be installed and configured on your website.
1. Create a master code in Woocommerce
A master code is a coupon that is created with specific settings so that it can be integrated with Probance One, and be used to generate targeted promo codes when sending campaign in Probance One.
When a master code is used in a newsletter or an automated campaign, the corresponding coupon is duplicated to create promo codes that will be restricted to the campaign recipients (one promo code is generated for 100 recipients).
A master code must be configured with all the characteristics of the promo code you wish to send, such as the type and amount of the discount, the validity duration or the delivery fees handling. It must also fits some conditions to be identified by our connector and exported to Probance One.
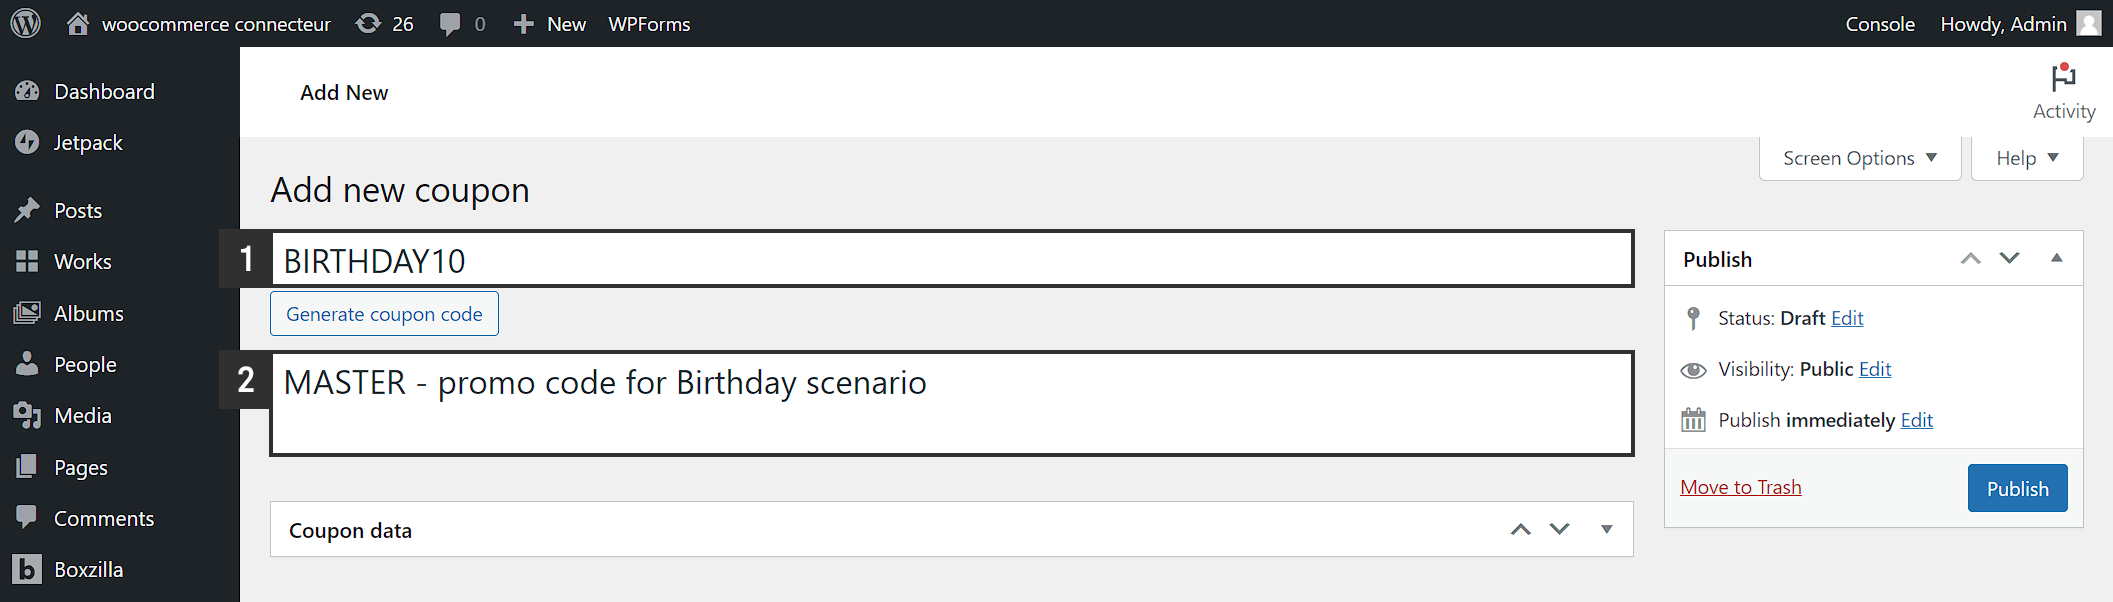
Access the menu Marketing > Coupons and click Add coupon.
- In the Coupon code field, type a value that will allows you to identify the coupon easily. This code will be used to configure the master in Probance One.
- In the Description field, include the word ‘MASTER’. This inclusion is necessary for the promo code to be identified as a Master code and exported to Probance One.
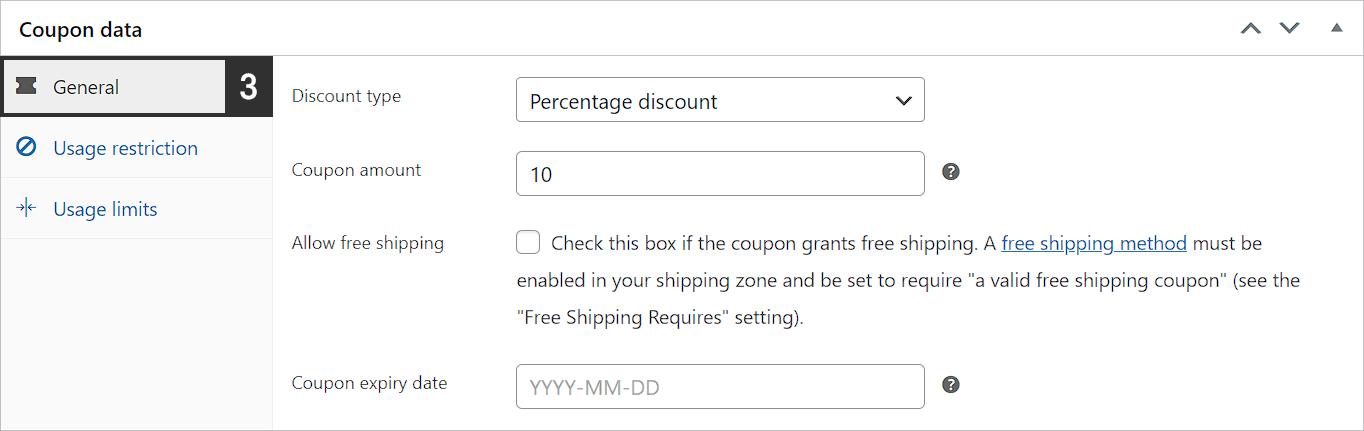
- The General tab allows you to define the type and value of the discount. Your master code must configured as follow:
- Discount type
Select the type of discount the promo codes must apply : it can be a percentage, a fixed amount discount on a product or on the full cart. - Coupon amount
Define the amount of the discount - Allow free shipping
If this option is activated, the promo code will offer the shipping feeds to the customer. This setting will be applied to all promo codes generated from the master code. - Coupon expiry date
Define the expiration date of the master code, based on the period of validity you want to apply to your promo codes. Whenever a promo code is generated from the master, this date will be actualized to maintain the same validity duration as the master. For example: if your promo code must be valid for a month, select a date that is 1 month away from the creation day.
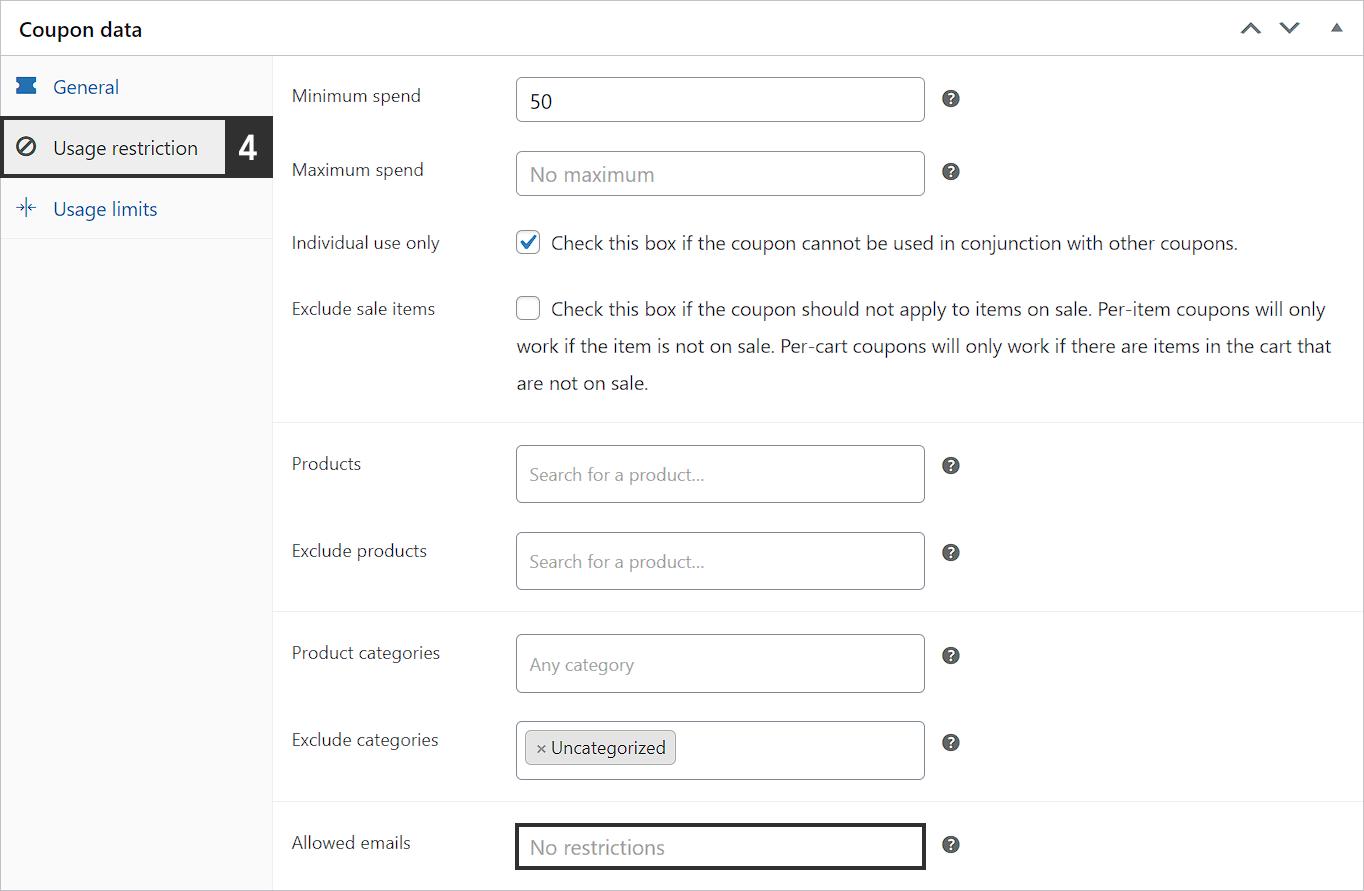
- The Usage restriction tab allows you to define how, when and by whom the promo code can be used. Your master code must configured as follow:
- Minimum spent
Define the minimum cart subtotal (tax excluded) from which the coupon will be usable. This setting will be applied to all promo codes generated from the master coupon. - Maximum spent
Define the maximum cart subtotal (tax excluded) allowed for the coupon to be usable. This setting will be applied to all promo codes generated from the master coupon. - Individual use only
If this option is activated, the coupon can not be used in combination with other coupons. This setting will be applied to all promo codes generated from the master coupon. - Exclude sale items
If this option is activated, the promo code will not be usable with already discounted products. This setting will be applied to all promo codes generated from the master coupon.. - Products
Select the products with which the discount will be applied (or products that must be in the cart for the promo code to be usable). This setting will be applied to all promo codes generated from the master coupon. - Exclude products
Select the products with which the discount will be not applied (or products that cannot be in the cart for the promo code to be usable). This setting will be applied to all promo codes generated from the master coupon. - Product categories
Select the product categories with which the discount will be applied (or categories that must be in the cart for the promo code to be usable). This setting will be applied to all promo codes generated from the master coupon. - Exclude categories
Select the product categories with which the discount will be not applied (or categories that cannot be in the cart for the promo code to be usable). This setting will be applied to all promo codes generated from the master coupon. - Allowed emails
This field must remain empty. When a promo code is generated from the master, it will be updated with the list of beneficiaries.
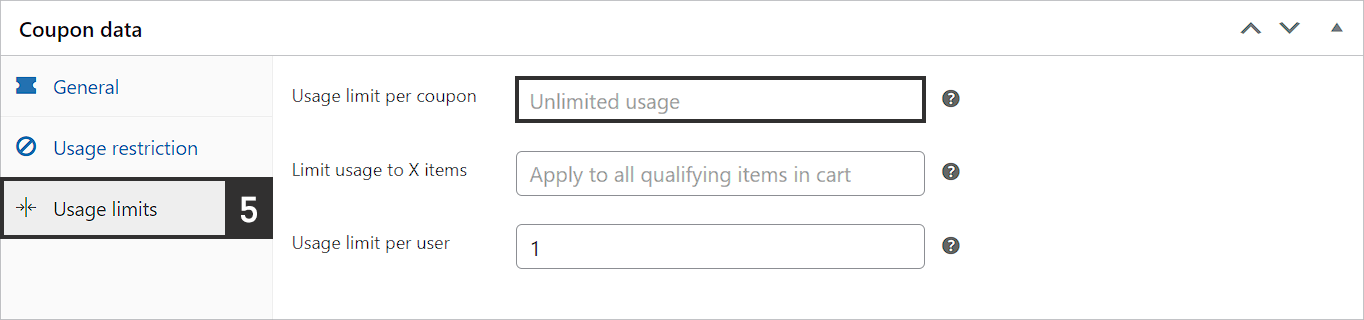
- The Usage limits tab allows you to define use restrictions for the promo code. Your master code must configured as follow:
- Limite d’utilisation par code
This field must remain empty. - Limite d’utilisation à X articles
Define the number of articles to which the promo code can be applied in one cart. If no limit is defined, the promo code will be applied too all eligible articles in the customer’s cart. This setting will be applied to all promo codes generated from the master code. - Limite d’utilisation par utilisateur
Define how many times the same customer can use the promo code. This setting will be applied to all promo codes generated from the master code.
- Click Publish to validate the creation of your master code.
Important : Your master code will be available in Probance One, and be usable in campaigns the day after its creation in Woocommerce.
2. Configure the master in Probance One
Once the master code is available in Probance One, you can configure it as a promo code generation source in a newsletter or an automated campaign.
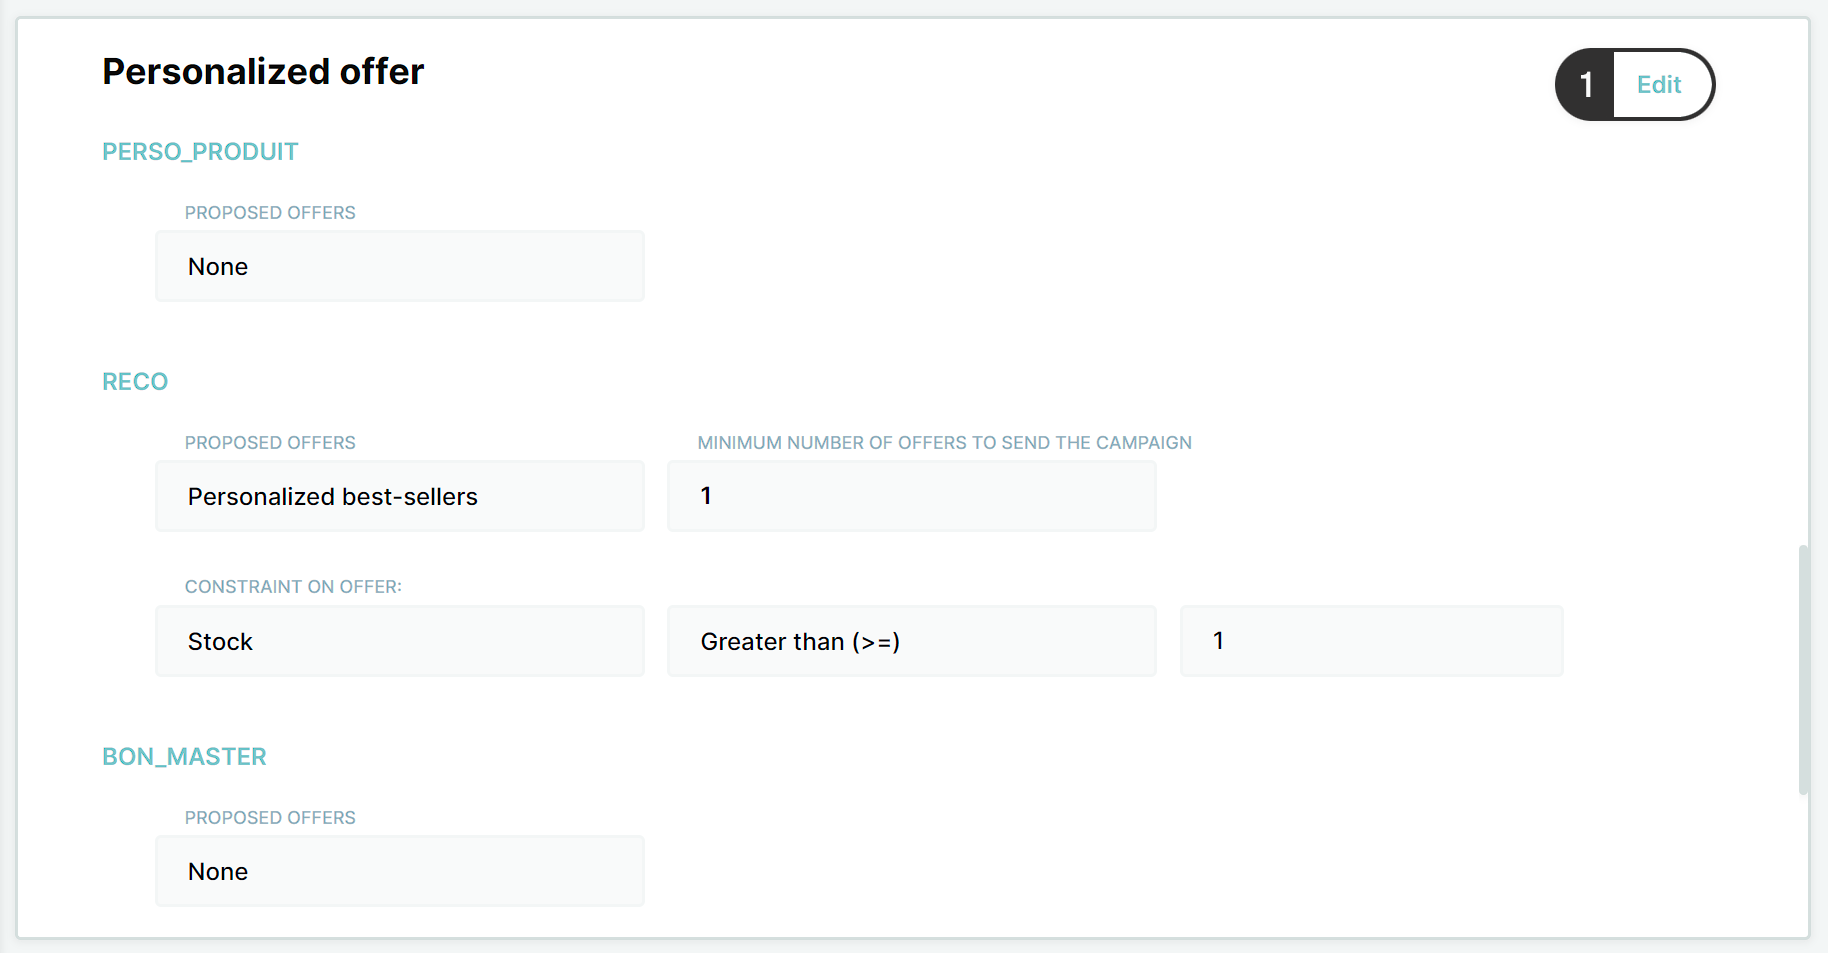
- Access the campaign page in Probance One, and click Edit in the Personalized Offer section.
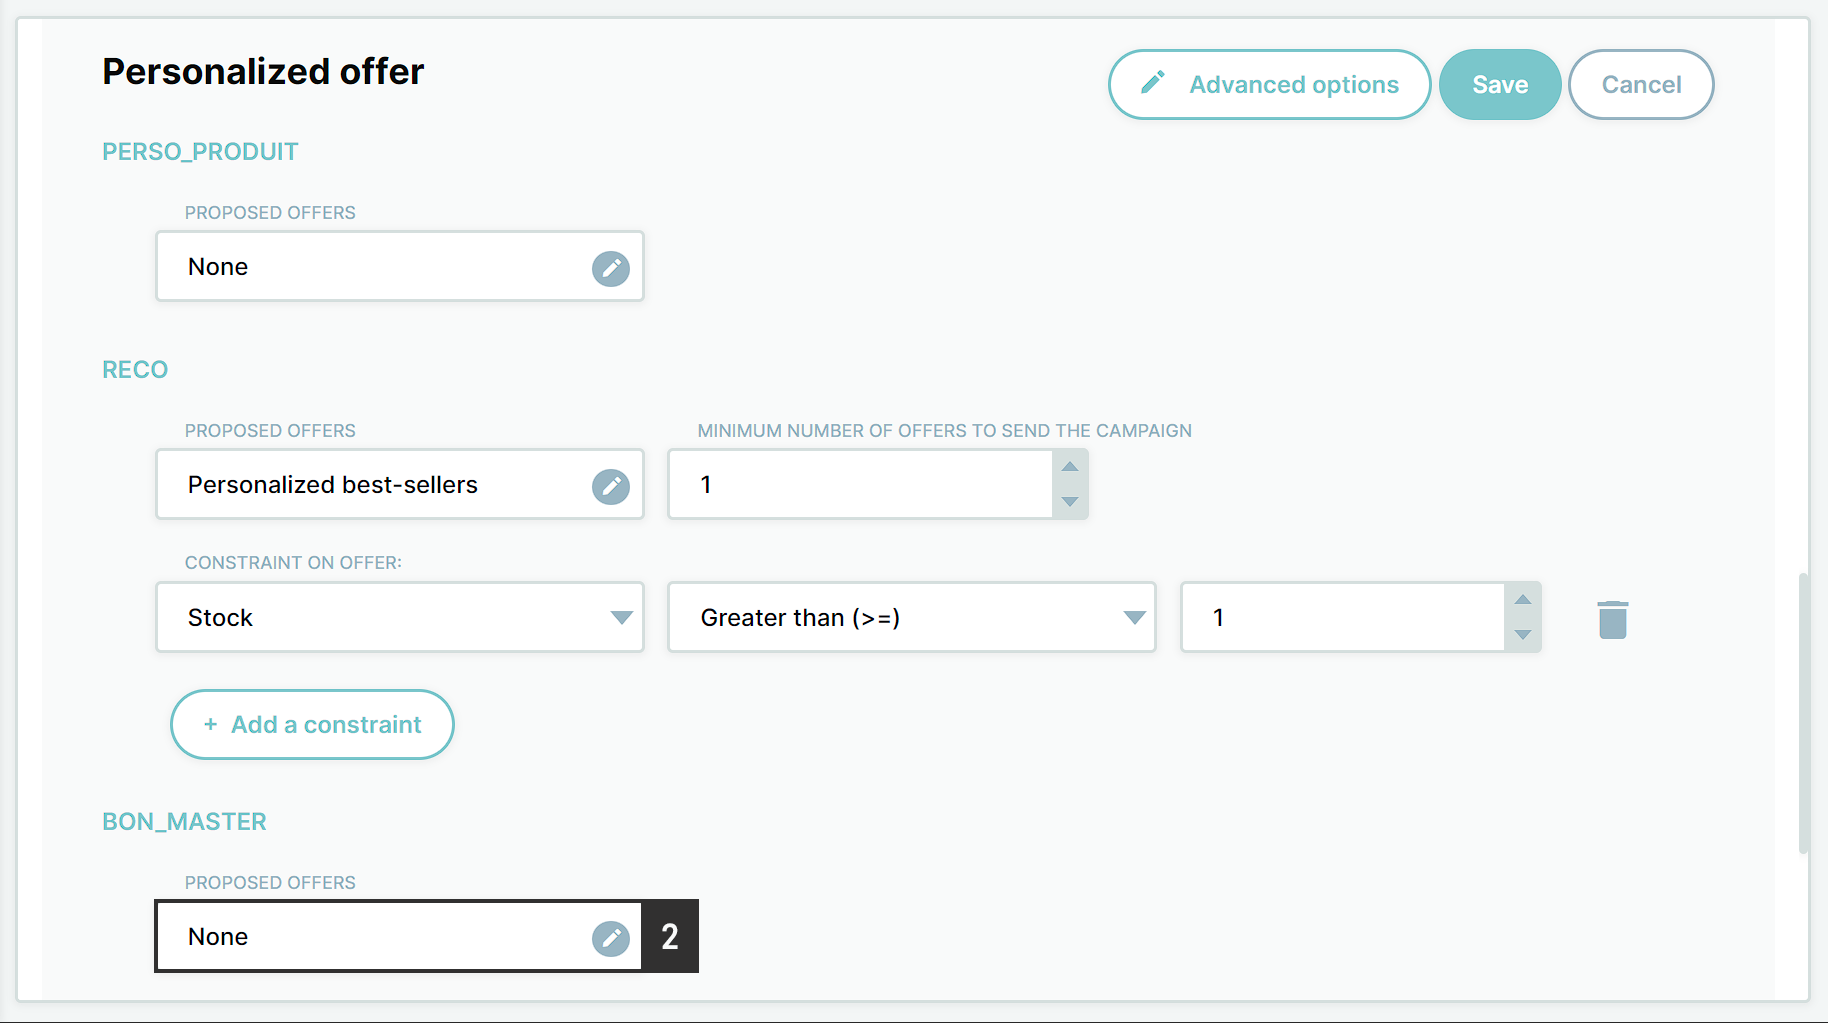
- Click the edition icon of the BON_MASTER proposed offer.
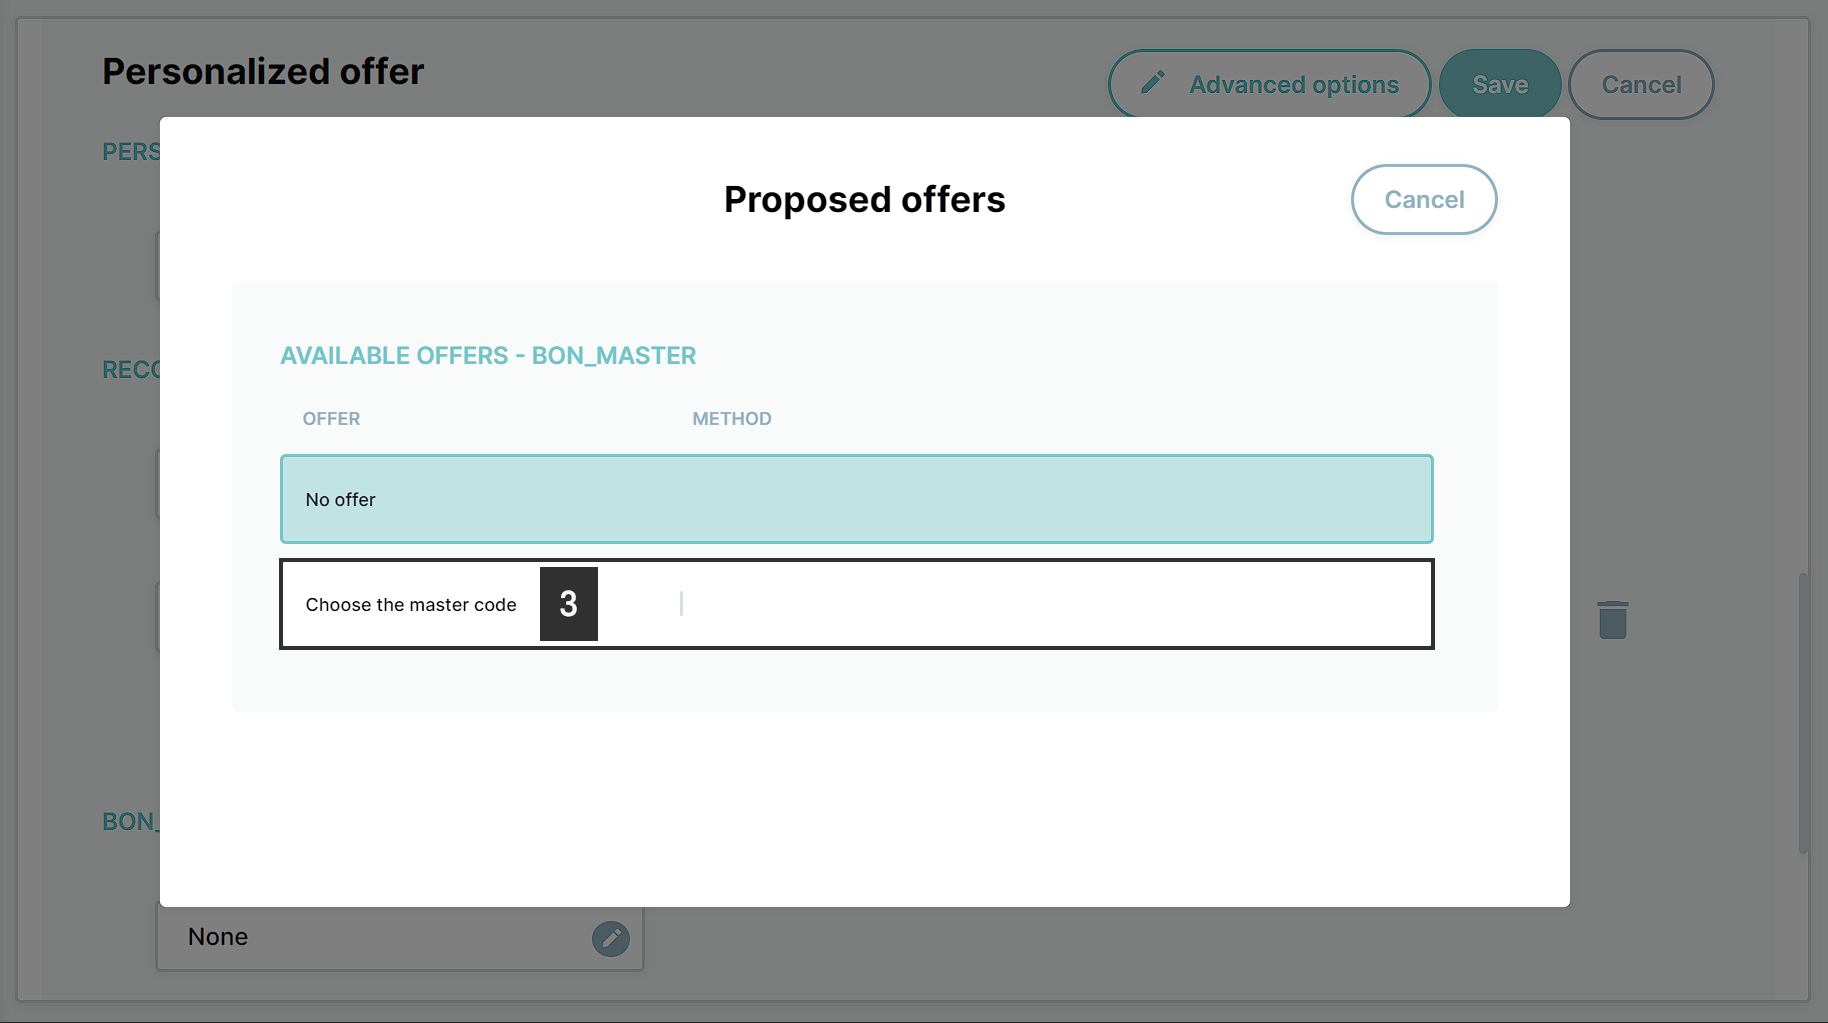
- Select Choose the master code.
- Set the minimum number of offers to send the campaign at 1.
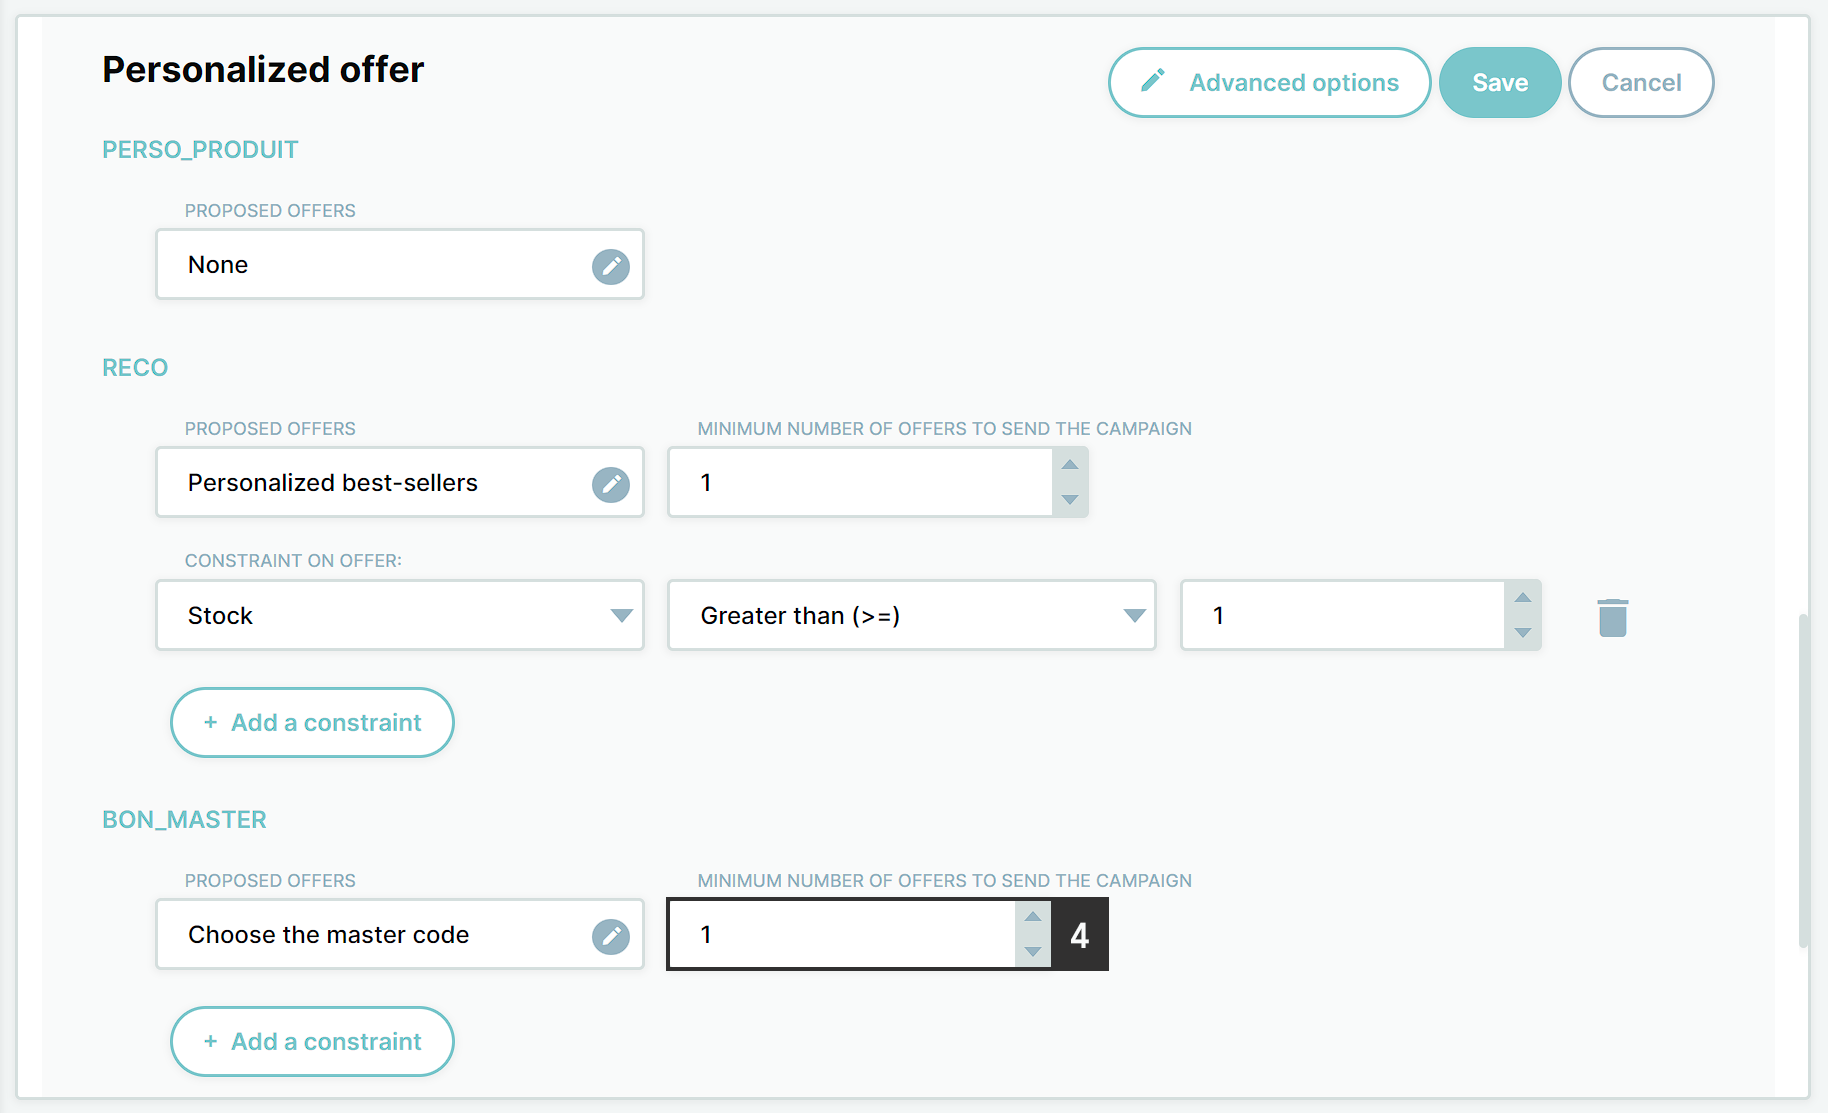
- Click Add a constraint. Select bon_master in the first dropdown list, and Equal to in the second one. In the third field, fill up or select the code of your master coupon in Woocommerce.
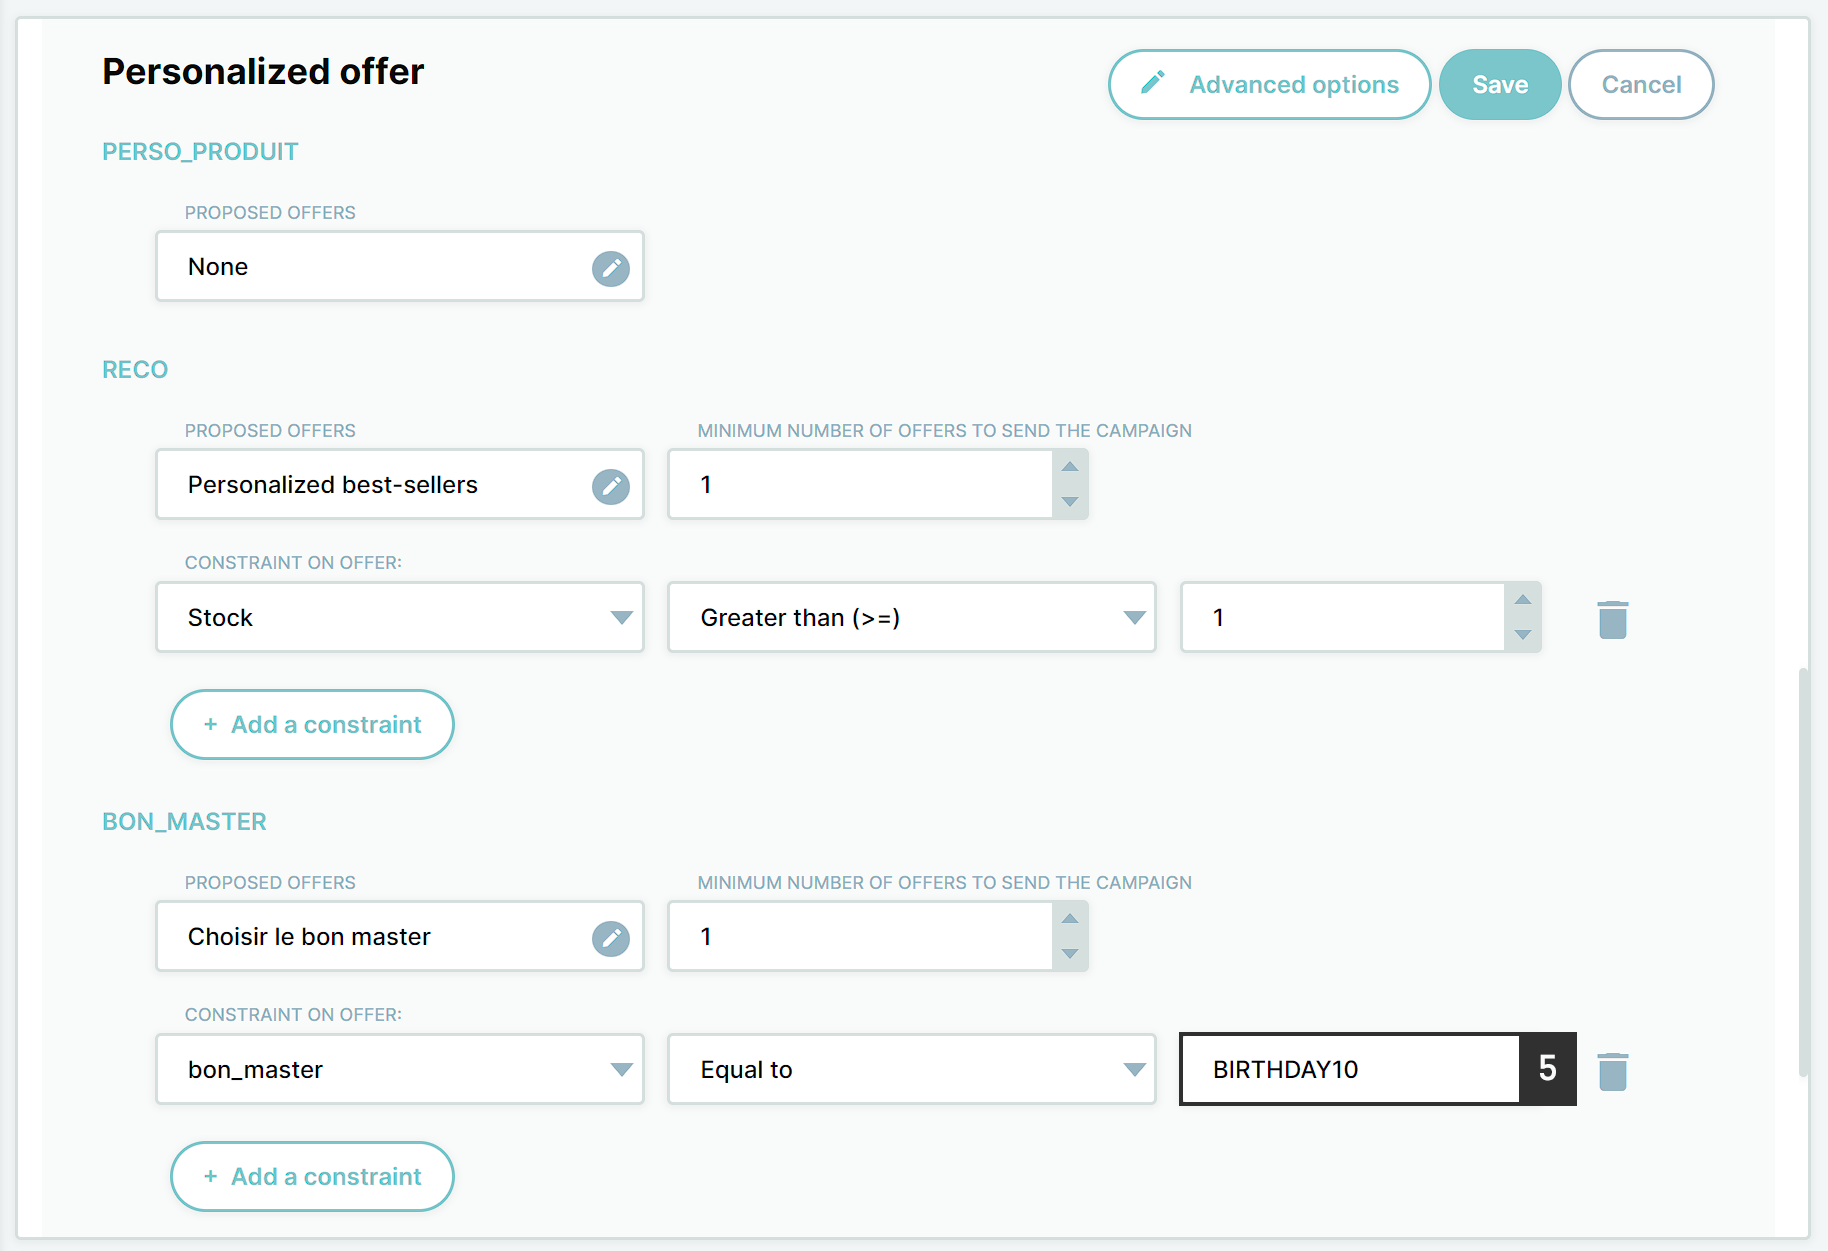
- Click Save.
Important: Make sure to fill up the code of the master, and not its name.
Then, whenever the campaign is sent, a promo code with the same configuration as the master code will be generated for every 100 recipients (that also exist in your Woocommerce database). The promo code will be restricted to those contacts, and the validity date will be actualized.
3. Include the promo code in the template
The last thing you need to do for your contacts to receive their own individual promo code is to display it in the campaign template.
To do so, you only need to add the personalization tag ${_bon_master_bon_master_1} where you want to display the code in the template. When the campaign is sent, the tag will be replaced with the promo code of each recipient.
Note: In the template preview and when sending test emails, the personalization tag is replaced by the code of the master.